Ad Blocker Detected
Our website is made possible by displaying online advertisements to our visitors. Please consider supporting us by disabling your ad blocker.
Discovering the art of saving seeds is a valuable skill that enhances self-sufficiency and allows for the cultivation of healthy and productive plants year after year. Dive deeper into the world of seed saving with this comprehensive guide!
As fall arrives, it’s time to wrap up garden activities, except for the fall crops like beets and Brussels sprouts that were planted in mid-summer to provide sustenance through the autumn and winter months.
In addition to preparing our annual garden beds for winter and preserving the remaining summer harvest before removing the summer annuals, it’s crucial to turn our attention to saving seeds for the upcoming year and beyond during this season.
While it’s always an option to purchase seeds from seed catalogs or local garden supply stores, there are numerous compelling reasons to embark on the journey of seed saving if you have the opportunity.
Why you should save seeds
- Firstly, learning how to save seeds is a significant step towards achieving self-sufficiency. By saving seeds, you become less reliant on external sources for your seed supply, leading to both independence and financial savings.
- Secondly, when you save seeds from your healthiest, most vigorous, and most productive plants, you create a unique strain of seeds that are well-adapted to your specific environment. These seeds are optimized for your conditions, resulting in higher germination rates, bountiful harvests, and improved resistance to diseases.
- Lastly, saving seeds provides you with a remarkable opportunity to create your own heirloom seeds, passing them down through generations within your family. By preserving and sharing family heirloom seeds, you not only pass on a legacy but also bestow future generations with the invaluable gift of self-sufficiency. Isn’t that amazing?
Before embarking on seed saving, it’s essential to understand a few key factors to ensure the viability of the seeds you’re saving
The Science of Seed Saving
Hybrids, Heirlooms, and Open-Pollinated Plants
When starting with seed saving, it’s crucial to understand the type of plant you want to save seeds from open-pollinated, heirloom, or hybrid.
Save seeds only from open-pollinated plants, as they will produce seeds that reliably reproduce the same type of plant as their parent.
Heirloom seeds, a type of open-pollinated seed, have been carefully selected from the healthiest and most productive plants and passed down through generations.
They are an excellent choice for seed saving. While all heirloom plants are open-pollinated, not all open-pollinated plants are heirlooms. However, both types can provide seeds that are suitable for saving.
Avoid attempting to save seeds from hybrid plants. Hybrids are created by deliberately cross-breeding two different plant species to combine desirable traits from both parents.
They are not genetically modified organisms (GMOs), but they are not entirely natural either, requiring human intervention for successful cross-pollination.
If you save seeds from a hybrid plant, the resulting plant may either revert back to one of the parent plants or display a strange combination of traits, often leading to an unpalatable outcome. Consequently, it is best to avoid growing hybrids and utilize valuable garden space for other plants.
You can often determine if store-bought seeds are hybrids or open-pollinated by checking the packet. Open-pollinated seeds are typically labeled with the abbreviation “OP,” while hybrid seeds are marked with “F1,” denoting the first generation resulting from cross-breeding two parent plants.
Regarding GMOs, home gardeners, and small organic farmers need not be concerned about accidentally planting GMO seeds. GMO seeds are directly sold from the supplier, usually large-scale, monoculture crop farmers, and are not typically available on the shelves of local garden supply stores.
Cross-Pollinating Vs. Self-Pollinating Plants
Another important aspect to consider before saving seeds is whether the plants you’re working with are cross-pollinating or self-pollinating plants.
Cross-pollinating plants require pollen from other plants of the same species for successful fertilization while self-pollinating plants can fertilize themselves. This distinction is significant because cross-pollinating plants have the potential to cross with different varieties within the same species. As a result, the seeds may produce plants that are a peculiar combination of the two parent plants, similar to the offspring of hybrid plants.
For instance, squash varieties are cross-pollinating plants known to cross with other squash varieties. Pumpkins can cross with spaghetti squash, and zucchinis can cross with butternut squash, leading to offspring that exhibit mixed characteristics of both parent plants. Similarly, plants in the brassica family, such as broccoli, cabbage, and Brussels sprouts, can cross-pollinate with one another.
While it is possible to save seeds from cross-pollinating plants, it often requires a significant amount of time, effort, and experience to ensure successful outcomes.
On the other hand, self-pollinating plants are much simpler to save seeds from, even for novice gardeners or seed savers. Seeds from self-pollinating plants will consistently produce offspring that are identical to the parent plant.
Examples of self-pollinating plants include peas, beans, tomatoes, peppers, and lettuce.
Choosing which plants to save seeds from
To save seeds from your garden plants, prioritize selecting the healthiest and most productive plants. Just as traits are inherited in humans and animals, plants also exhibit characteristics from their parent plants. If you aim to cultivate strong, healthy, and high-yielding offspring, begin with strong, healthy, and high-yielding parent plants.
Additionally, allow the fruit to ripen fully before saving the seeds. It is beneficial to let the fruit become overripe. This practice ensures that the seeds have reached optimal maturity and mimics the natural conditions of a plant ready to disperse its seeds.
How to save seeds from peas and beans
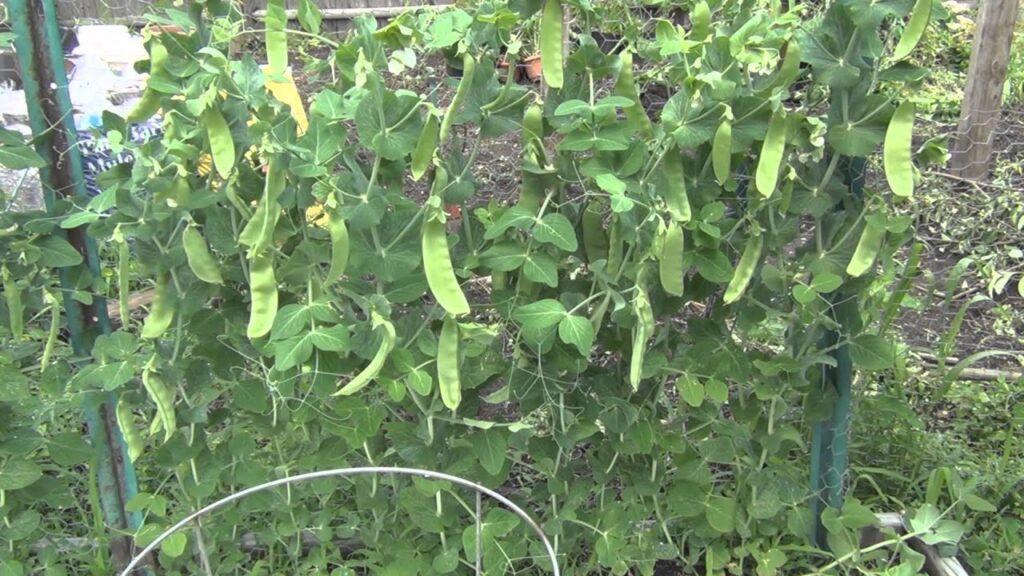
Saving seeds from peas and beans is straightforward and hassle-free. Simply allow the pods to ripen and dry out on the vine. Once dry, open the pods and extract the large seeds. Place the seeds in a well-ventilated indoor location away from direct sunlight to dry. It’s advisable to avoid using a dehydrator as higher heat can negatively impact germination rates.
Once the seeds are completely dry, they can be stored. To determine their dryness, press the edge of your fingernail into the side of a seed. If it leaves a dent, the seeds are not sufficiently dry and should be left to dry for a bit longer. If there is no dent, the seeds are dry and ready for storage.
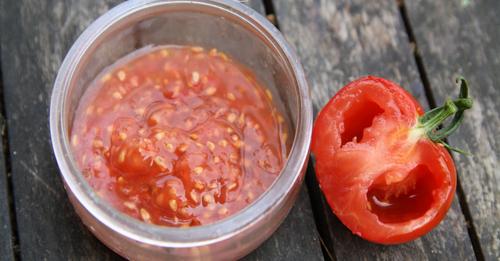
How to save seeds from tomatoes and peppers
Tomato and pepper seeds grow inside the fruit, as you’ve probably noticed if you’ve ever cut into one of these common fruits/vegetables (and who hasn’t?)
Let the tomatoes or peppers you’ll be saving seeds ripen fully on the vine before harvesting them. Then, to save the seeds, simply cut them open and remove the seeds from the inside.
For peppers, all you need to do is lay out the seeds and let them dry just like peas and beans. For tomatoes, technically you can do the same, but allowing them to ferment for a couple of days actually makes it easier to save seeds from them AND makes the seeds more viable in the end.
To ferment tomato seeds, remove them from the tomato and put them in a jar along with whatever pulp that’s naturally attached to them. Then, cover with a couple of inches of water and place a coffee filter or some cheesecloth on top (just to keep bugs out).
After three or four days the seeds are ready to be dried. First of all, discard any seeds that have floated to the top. Usually, this is a sign that those seeds are not viable, so fermenting helps to weed out the “bad” seeds. Next, dump the water out and strain the seeds through a fine mesh sieve. Run them under cold water and gently rub them against the sieve until all of the pulp washes away. You’ll be left with nice, clean tomato seeds.
Lay clean tomato seeds out to dry (I like to put mine on a paper towel) and allow them to air dry for a few days until completely dry, then store.
How to save lettuce seeds
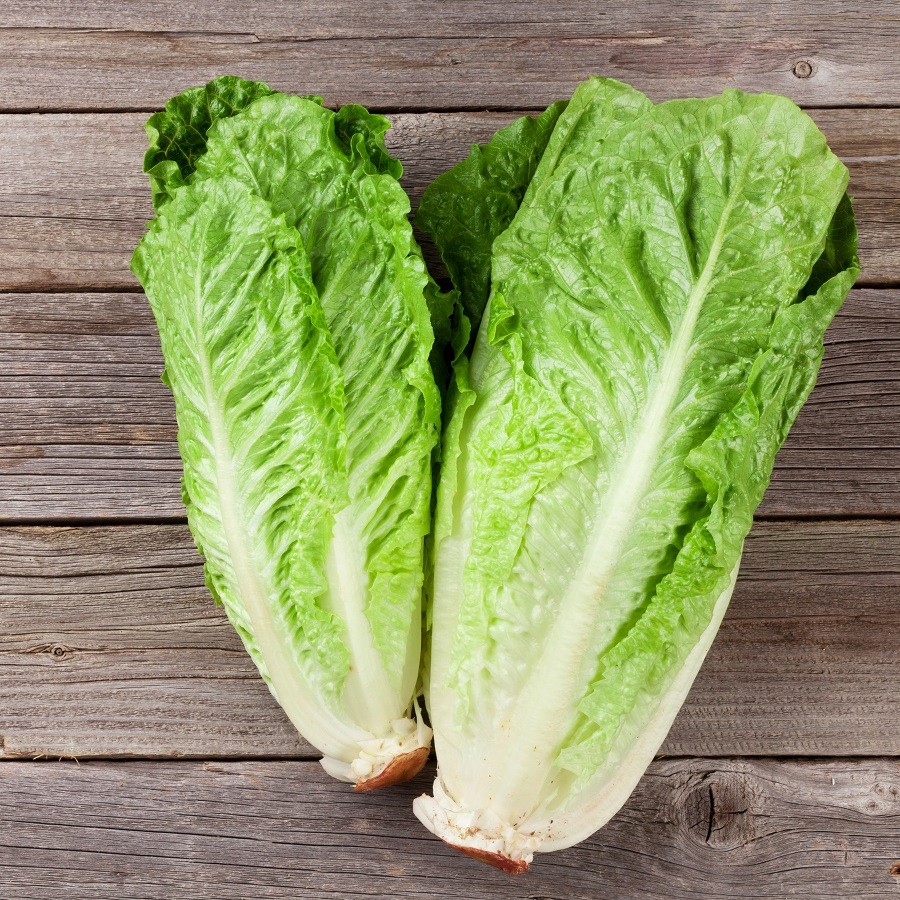
Saving lettuce seeds requires some attention to detail, but it can be done successfully. Here’s how:
- Allow the lettuce plant to flower and let the flowers go to seed. The flower heads will eventually turn white and fluffy, resembling dandelion flowers once they’ve gone to seed.
- Carefully pull out the white fluffy parts, as the seeds will be attached to the ends. Take care to separate the seeds from the fluff gently.
- Once you have the seeds separated from the fluff, set them aside to dry. Ensure they are placed in a dry and well-ventilated area.
- Once the seeds are completely dry, they can be stored for future use.
By following these steps, you can successfully save lettuce seeds for future planting.
Saving seeds from biennial plants
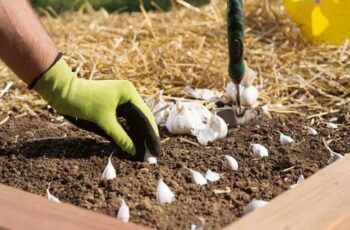
Certain plants, known as biennials, require two years to complete their life cycle and produce seeds. Examples of biennials include carrots, beets, and onions.
To save seeds from these plants, you need to leave them in the ground over winter. They will go through a dormant phase and resume growth in the following spring. By late spring or early summer, the plants will mature, and you can collect the seeds for saving.