Ad Blocker Detected
Our website is made possible by displaying online advertisements to our visitors. Please consider supporting us by disabling your ad blocker.
10 Plants You Can Regrow From Kitchen Scraps

The average home consumes plenty of fresh food but produces very little. Growing your own food can seem hard when you have yet to buy a bunch of seeds and equipment. But what if you could grow food from what is in your fridge or pantry right now? sounds awesome, right?
This article is going to show you exactly that, explaining how to regrow 10 plants from food scraps. You can grow fresh new leaves or even entirely new plants from the parts of plants that we don’t eat anyway and would otherwise go to waste!
Note: Some of the methods require plant pots and soil. Loose potting soil is best for all of the methods. You’ll also need different sized pots, however, you can consider up-cycling or re-using plastic ice cream tubs and other containers.
Why grow from kitchen scraps or ‘waste’?
Fresh nutritious produce can be expensive and often runs up a significant portion of our grocery shopping costs. Luckily there are ways we can reduce this cost whilst experiment with growing our own food at home.
Growing with parts of plants normally considered as waste does an amazing job at shifting our perspective and deepening our relationship with the cycle of growing food. Items we think of as waste, like a deflated, dry garlic clove can grow into an entirely new garlic bulb. There is also definitely a certain joy in harvesting your own food after patiently watching it grow!
Using food scraps to grow food is also a great way to contribute to tackling the important issue of food waste. Did you know that UK households waste 6.6 million tonnes of food every year? Additionally, if global food waste was a country, it would be the third-largest emitter of greenhouse gases! (LFHW) When we consider the ongoing need to increase food supplies as populations increase, tackling food waste is clearly essential.
The following methods are simple ways to reduce our food waste in a productive way!
How to regrow plants from food scraps
1. Spring Onions
Perhaps the easiest of all of the methods in this article, Spring Onions can be regrown from their white root bases, growing only in water.
-
Cut the green top of the spring onion, leaving 3-5cm of the white root base intact.
-
Place this section into a shallow jar and submerge half of the plant in water.
-
Leave in a sunny spot and change the water every other day.
-
Harvest directly from the jar when ready.


2. Lemongrass
Stalks of lemongrass can be hard to come by and are sometimes quite expensive. You can get more bang for your buck by growing the ends in water.
-
Cut the top of the stalk off and use it in your cooking, leaving 3-5cm of stalk remaining by the root section. Place this into a glass and submerge half of the stalk with water.
-
Place in a sunny location and replace the water every other day.
-
You can harvest once the stalks are a size that you’re happy with.
-
Optionally, once the roots have grown you can place them in a pot with soil to grow further.
3. Lettuce
Lettuce leaves can be regrown by saving the root section at the bottom of the lettuce. This works best with hearts of lettuce like the Little Gem or Romaine varieties.

-
Cut lettuce leaves, making sure to leave 3-5cm of height on the root section
-
Place it in a bowl with enough water to submerge the roots (around 1cm)
-
Place this in a sunny position and change the water every other day.
-
After two weeks, when the lettuce sprouts new leaves and roots, you should plant it out into potting soil for prolonged growth.
-
Harvest when the leaves grow to baby leaf size (10cm).
4. Celery

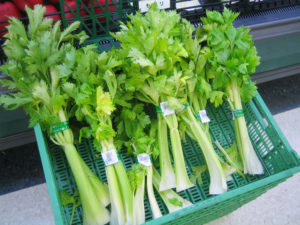
Similar to the methods above, Celery can also be regrown from the base of a mature plant.
-
Cut all celery stems off, leaving 3-5cm of stem at the root section.
-
Place it in a bowl with warm water.
-
Place the cutting in a warm and sunny position and change the water every other day.
-
When the celery sprouts new leaves, you should plant it out into the soil.
-
Harvest when the plant has large, healthy stalks.
5. Sweet Potatoes
Growing Sweet Potatoes can take a while but it’s an exciting project. Unlike normal potatoes, if you plant a sweet potato directly into the ground, it will grow a plant but it won’t produce any more sweet potatoes.
We need to grow ‘slips’ to be able to crop sweet potatoes: these are sections of stems and roots, which grow from nodes on the potato. It is best to start this process indoors between February and April so they can be planted out after the last frost of spring.

-
Pierce toothpicks or wooden skewers into the middle of the sweet potato. Add lots of water into a jar and place it in with the top facing up (this is the pointy end).
-
Place in a sunny position and change the water regularly.
-
Roots, stems, and leaves will begin growing from nodes called eyes on the potato over the next few weeks.
-
When the slips have grown substantial roots and stems, you can break it off the sweet potato and plant into soil indoors, potting it on as it gets larger.
-
Sweet potatoes are frost-sensitive so planting them outdoors is best done after any risk of late frost (end of May – June). Growing them in the ground during the summer is advised because the tubers can get quite big!
-
They can be harvested before the frost in the autumn or when leaves begin to turn yellow and die back.

