Ad Blocker Detected
Our website is made possible by displaying online advertisements to our visitors. Please consider supporting us by disabling your ad blocker.
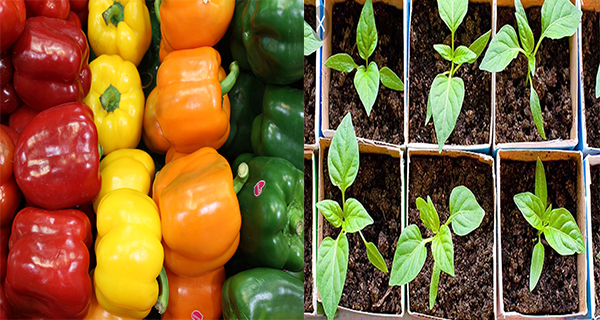
Growing bell peppers in your garden can be a rewarding experience. Not only are they a delicious and nutritious addition to any meal, but they are also easy to grow and require minimal maintenance. With the right knowledge and a bit of effort, you can have buckets full of bell peppers in no time. Here are 15 secrets to help you grow buckets full of bell peppers in your garden.
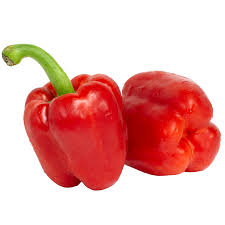
There are many reasons to love bell peppers besides their beauty. For starters, they are really easy to grow, they are loaded with nutritional value and they taste amazing raw and cooked.
If you are a first–time gardener, peppers are a great place to start.
Bell peppers, also known as sweet peppers can be red, yellow, orange, green, or even lavender and white. Bell peppers are the only members of the genus Capsicum that does not produce capsaicin, the extremely hot chemical that we are familiar with in hot peppers. Peppers are native to Mexico, Central America, and northern South America.
To grow this tender tropical warm–season plant you can either start seeds early indoors or purchase plants after the risk of frost has passed. Only those that live in very warm climates such as the deep south can start seeds outdoors.
1/Starting Seeds Indoors
Starting seeds indoors will save you money and give you a headstart on the growing season. This is particularly useful if you live in an area with a short growing season. Seeds should be started about 8–10 weeks before the last spring frost date.
1/ Choose high–quality organic seeds for the best results.
2/ Fill small starter pots with organic potting soil. I like the little biodegradable pots that can be planted directly into the ground.
3/ Place three seeds in each pot and cover them with a light layer of soil.
4/ Place in a warm area with plenty of light – pepper seeds will germinate at 70 degrees and warmer.
5/ Keep the soil moist but not saturated.
6/ Once the seedlings begin to grow, thin out the weakest one and let the other two grow.
7/ Fourteen days before transplanting, begin to harden off your plants. To do this water the plants first and place them outdoors in a sheltered spot. If you have a cold frame or unheated greenhouse this works great. Be sure to harden off on days when the temperature is steady. Leave your plants outside for two hours on the first day, and four hours on the second day with more direct sun. Gradually increase the amount of time the plants spend outdoors in direct sunlight. Do this over two weeks‘ time. You can leave the plants outside all night only if there is no danger of frost.
8/ Add organic fertilizer or aged compost to your garden soil one week before transplanting pepper plants.
9/ Transplant the seedlings outdoors after all threat of frost has passed. The soil must be at least 65 degrees or the plants will not make it. If you need to warm up your soil, put a layer of black plastic over it for about two weeks before planting. Place plants 18 to 24 inches apart but keep the plants that shared a pot close so they will touch.
10/ Place three matchsticks in the hole with each plant and add one teaspoon of organic fertilizer. This will give the plants sulfur which helps them grow. • Once peppers get their true leaves, fertilize weekly until fruit appears.
11/ Water peppers regularly but do not saturate them.
2/Starting Pepper Plants

If you start with more mature pepper plants, place them 18 inches apart in garden soil that is rich with organic matter. Peppers also grow well in raised beds and containers. Add slow–release organic fertilizer to the hole when planting. To grow large, healthy peppers, plants need between 6 and 8 hours of sunlight daily. Water plants immediately and provide 1 to 2 inches of water per week – more if the weather is hotter. Feed plants every three weeks after fruit sets with an organic fertilizer to promote growth. Apply mulch or straw around each plant to help retain moisture. Provide support to pepper plants as they grow.
3/Harvesting
Harvest peppers as soon as they reach a good size. • As peppers stay on the vine they become sweeter and also contain more vitamin C. • Don’t pull peppers off of the vine, instead use sharp and clean scissors or a sharp and clean knife to remove fruit from the plant.
4/ Storing Peppers
Place peppers in a plastic bag and refrigerate for up to ten days after harvesting. You can also dry peppers in a conventional oven. First, wash the peppers and remove all seeds. Cut them into one–half–inch strips. Steam the strips for ten minutes and spread them on a baking sheet. Set the oven to 140 degrees and dry the peppers until they are brittle. Once the peppers are cool, place them in storage bags. Freezing peppers is also a great way to store your harvest. I like to freeze them and use them in soups and stews all winter. Wash peppers first and cut off stems. Cut peppers in half and remove seeds and membranes. Cut into strips or even dice and place on a cookie sheet. Put the cookie sheet in the freezer for about an hour or until frozen. Place the frozen peppers in a freezer bag, removing as much air as possible.