Ad Blocker Detected
Our website is made possible by displaying online advertisements to our visitors. Please consider supporting us by disabling your ad blocker.
Enhance your garden or raised bed with a burst of colorful borders or add a vibrant touch to your patio. Marigolds offer an excellent choice for these purposes. This article provides valuable insights on planting and maintaining marigolds in your garden or patio planter this season.
Fertilizing Marigolds – How To Get Your Marigolds Blooming Bigger Than Ever!
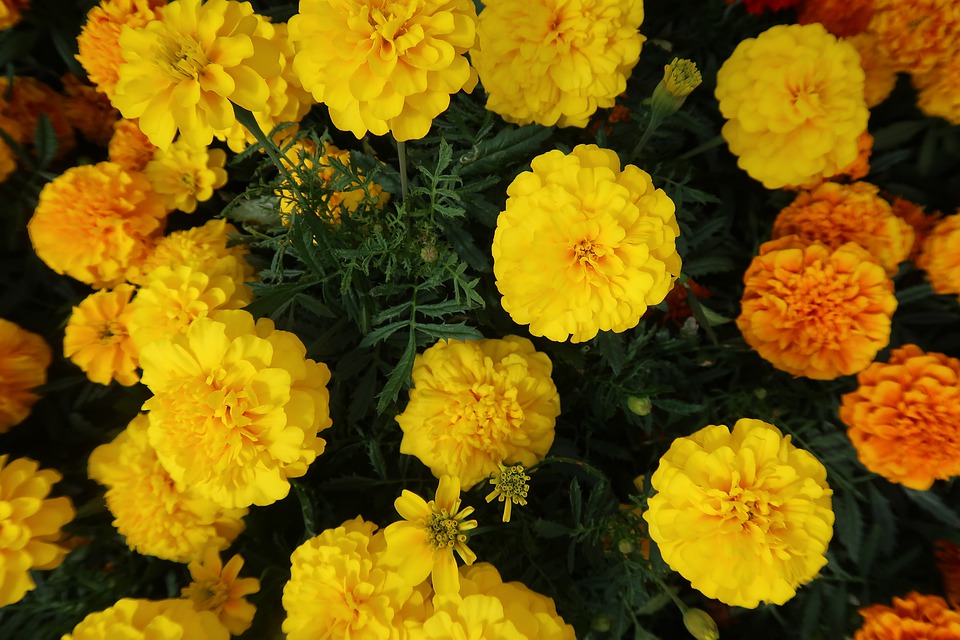
Marigolds gained immense popularity in the 1970s and remain a favored annual flower among home gardeners today. Flourishing in warm weather, these delightful blooms make a splendid addition to any landscape, patio pot, or vegetable garden. Their vibrant hues predominantly include shades of orange, yellow, and dark red.
Thriving in full sun and favoring heat, these annuals bloom throughout the season, gracing your surroundings with their vivid colors and numerous benefits. Once established, marigolds are effortlessly low-maintenance plants, demanding minimal care and attention.
About Marigolds
Elevate your garden or raised bed with captivating bursts of colorful borders or infuse your patio with vibrant charm. Marigolds stand out as an exceptional choice to achieve these objectives. This comprehensive article offers valuable insights into planting and maintaining marigolds in your garden or patio planter this season.
Marigolds surged in popularity during the 1970s and continue to captivate home gardeners as a beloved annual flower. Flourishing in warm weather, these enchanting blooms make a splendid addition to any landscape, patio pot, or vegetable garden. With a predominant palette of striking orange, yellow, and deep red hues, marigolds create an atmosphere of vibrancy.
Adapting perfectly to full sun and relishing in heat, these annuals grace your surroundings with their vivid colors and a plethora of benefits throughout the entire season. Once established, marigolds effortlessly thrive with minimal maintenance, demanding little care or attention.
Marigolds: Annual or Perennial?
While marigolds have the ability to self-seed, they are commonly regarded as annual plants. Marigolds thrive as annuals in zones 3-11, with extended blooming periods observed in zone 8 and higher.
Typically, they complete their life cycle within a year or less. However, marigolds are renowned for their abundant seed production, which can result in self-sowing and subsequent re-emergence in the following year after the initial planting. This characteristic adds to the charm and resilience of these vibrant flowers.
When to Plant
For optimal results, it is advisable to plant marigolds after the last frost occurrence in your specific region. Fortunately, most garden centers offer marigold transplants during the early spring season, providing a convenient option for adding pre-established marigolds to your gardens and patios.
Transplanting can commence as soon as your last frost date arrives, keeping in mind that marigolds have a slight sensitivity to colder temperatures. If nightly temperatures drop below 40 degrees Fahrenheit, they become vulnerable to potential damage.
To safeguard your marigolds from these detrimental conditions, it is crucial to plant them following the last frost date in your locality. In cases where a night frost is predicted, taking preventive measures such as bringing your planter indoors overnight or covering the marigolds with a frost cloth can effectively shield them from the harmful impact of low temperatures. This thoughtful approach ensures the optimal growth and preservation of your marigold plants.
How to Plant
Planting marigolds in your garden is a simple and straightforward process that yields beautiful results. Here are some steps to ensure successful transplantation:
-
Transplanting Marigold Plants:
- Gently remove the marigold plant from its nursery container. If it resists, roll the pot between your hands to loosen it.
- Once the plant is out, gently separate the root ball by hand or with a garden shovel. This promotes better root growth and establishment.
- Place the plant in the prepared soil and fill it around it, ensuring it is securely positioned.
- Water the plant thoroughly to settle the soil and provide initial hydration. Now, enjoy the company of your new marigold companion!
-
Starting Marigold Seeds Indoors:
- Begin seeding marigolds indoors 6-8 weeks before the last frost date in your area.
- Plant the seeds about one inch deep in a well-draining potting or seed-planting mix.
- Find a warm and sunny location for the newly sown seed tray to ensure optimal germination.
- Garden centers often offer a variety of marigold seeds if you prefer starting from scratch.
Note: Adequate light is essential for healthy seedlings. If they don’t receive sufficient light, they may become elongated and weak.
-
Caring for Marigold Seedlings:
- If you choose to plant marigold seeds in trays, ensure they remain moderately moist until they sprout.
- Once the seeds have germinated, you can allow the soil to dry out slightly between waterings.
- Marigold seeds typically germinate within 4-14 days, with faster results in warm and consistently moist soil. However, variations in climate and growing conditions may affect germination time.
Transplanting From Seed
-
Assessing Seedling Readiness for Transplanting:
- To ensure your marigold is ready for transplanting, examine the roots. If the roots have reached the bottom of the seed cell and started to encircle the tray or pot’s exterior, it’s a clear sign that they are ready to be transplanted.
- Transplanting marigolds prematurely can lead to stunted growth and potential damage to the plants. Wait until the roots have adequately developed before proceeding with transplantation.
-
Directly Sowing Marigold Seeds:
- Alternatively, you can sow marigold seeds directly into your garden or patio pots after the risk of frost has passed for the season.
- Choose an area that receives full sun for at least 6-8 hours daily. Ensure the soil is rich and well-draining.
- Plant the seeds at least one inch apart and one inch deep in the prepared soil.
- Keep the soil consistently moist until the seeds begin to sprout. Proper hydration is crucial for germination.
- Once the seedlings have emerged, thin them out, leaving approximately 10-12 inches of space between each plant. This spacing allows for optimal growth and access to sunlight in your garden.
How to Grow
Marigolds are a breeze to grow due to their low-maintenance nature. Whether you choose to cultivate them in patio pots, planters, or directly in the ground as a charming border for your landscape or garden, marigolds adapt well to different settings. However, it’s important to ensure they are planted in a sunny location with well-draining soil. With these simple considerations, you can enjoy the vibrant beauty of marigolds with ease.
Sunlight
Sunlight: Marigolds thrive in full sun, requiring a minimum of 6-8 hours of direct sunlight each day. To ensure vibrant flowers and healthy plants, it’s crucial to plant marigold transplants in well-draining, loamy soil in a location that receives ample sunlight. In warmer climates or high altitudes, a few hours of shade may benefit marigolds, but excessive shade can result in leggy growth.
Location
When planting marigolds, provide sufficient space between plants. In planters or pots, ensure a width and depth of at least six inches. In a vegetable garden or raised bed, maintain a minimum distance of 12 inches between marigolds and other plants. This spacing allows for proper airflow, room for growth, and optimal exposure to sunlight.
Choose a location that receives 6-8 hours of sunlight daily, prioritizing areas with afternoon sun, as it is stronger than morning sunlight. Observing your specific space and sunlight patterns will help determine the ideal planting spots, although south-facing areas generally receive ample sunlight.
Water
While marigolds are drought-tolerant, regular watering is essential for their optimal growth. Ensure they receive consistent moisture without overwatering. Avoid keeping the soil overly moist, allowing the top 2-3 inches to dry out before watering.
This practice promotes plant health and helps prevent diseases. If marigolds are planted near or within a vegetable garden, water them along with your veggies.
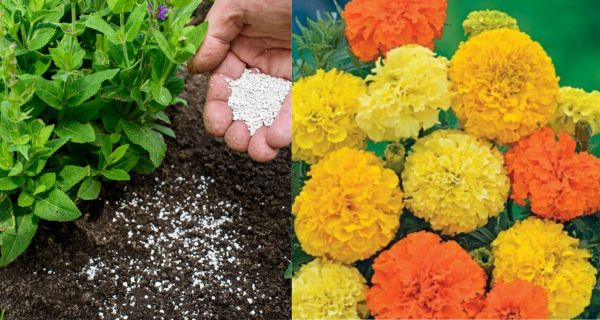
Soil
Marigolds are not demanding in terms of soil requirements but thrive in well-drained, loamy soils. When planting in pots, use potting soil that provides good drainage. Ensure your containers have drainage holes to allow excess water to escape, preventing waterlogging and root issues.
Climate & Temperature
Climate & Temperature: Marigolds thrive in hot climates and are not frost-tolerant. It is recommended to plant marigolds after the threat of frost has passed. They perform best in temperatures above 70-75 degrees Fahrenheit.
Cooler temperatures can impede their growth and potentially harm or even kill the plant. Their exceptional heat tolerance makes them a popular choice for full-sun landscape beds and vegetable gardens.

